Introduction
Amid recent actions by the Financial Intelligence Unit (FIU), issuing show-cause notices to offshore exchanges, including Gate.io, CoinDCX takes proactive steps to empower Indian users. In adherence to FIU regulations, CoinDCX now presents a crypto deposit feature, ensuring secure and compliant transfers of crypto assets and protecting Indian users from potential offshore exchange risks.
Highlighting security and compliance, CoinDCX introduces this guide to facilitate the seamless transfer of your Bitcoin holdings from Gate.io to CoinDCX. This move ensures a smooth transition to a compliant and secure Indian exchange.
Key Considerations Before Initiating a Crypto Transfer
Before initiating a crypto transfer from Gate.io to CoinDCX, several critical considerations can enhance the process’s smoothness and security. Begin by verifying the supported cryptos and networks on both platforms for seamless compatibility. Evaluate associated transaction fees for transparency and cost-effectiveness. Double-check wallet addresses to prevent errors that may result in asset loss. A clear understanding of withdrawal limits and processing times on both platforms streamlines the transfer, ensuring a trouble-free and secure crypto migration. These considerations play a crucial role in a successful and worry-free transfer between Gate.io and CoinDCX.
Read more: How to make deposits on CoinDCX
How to Transfer Crypto Assets from Gate.io to CoinDCX
Step 1:
To begin depositing cryptos to your CoinDCX app from your Gate.io account, log in to your CoinDCX app and tap the ‘Deposit’ button.
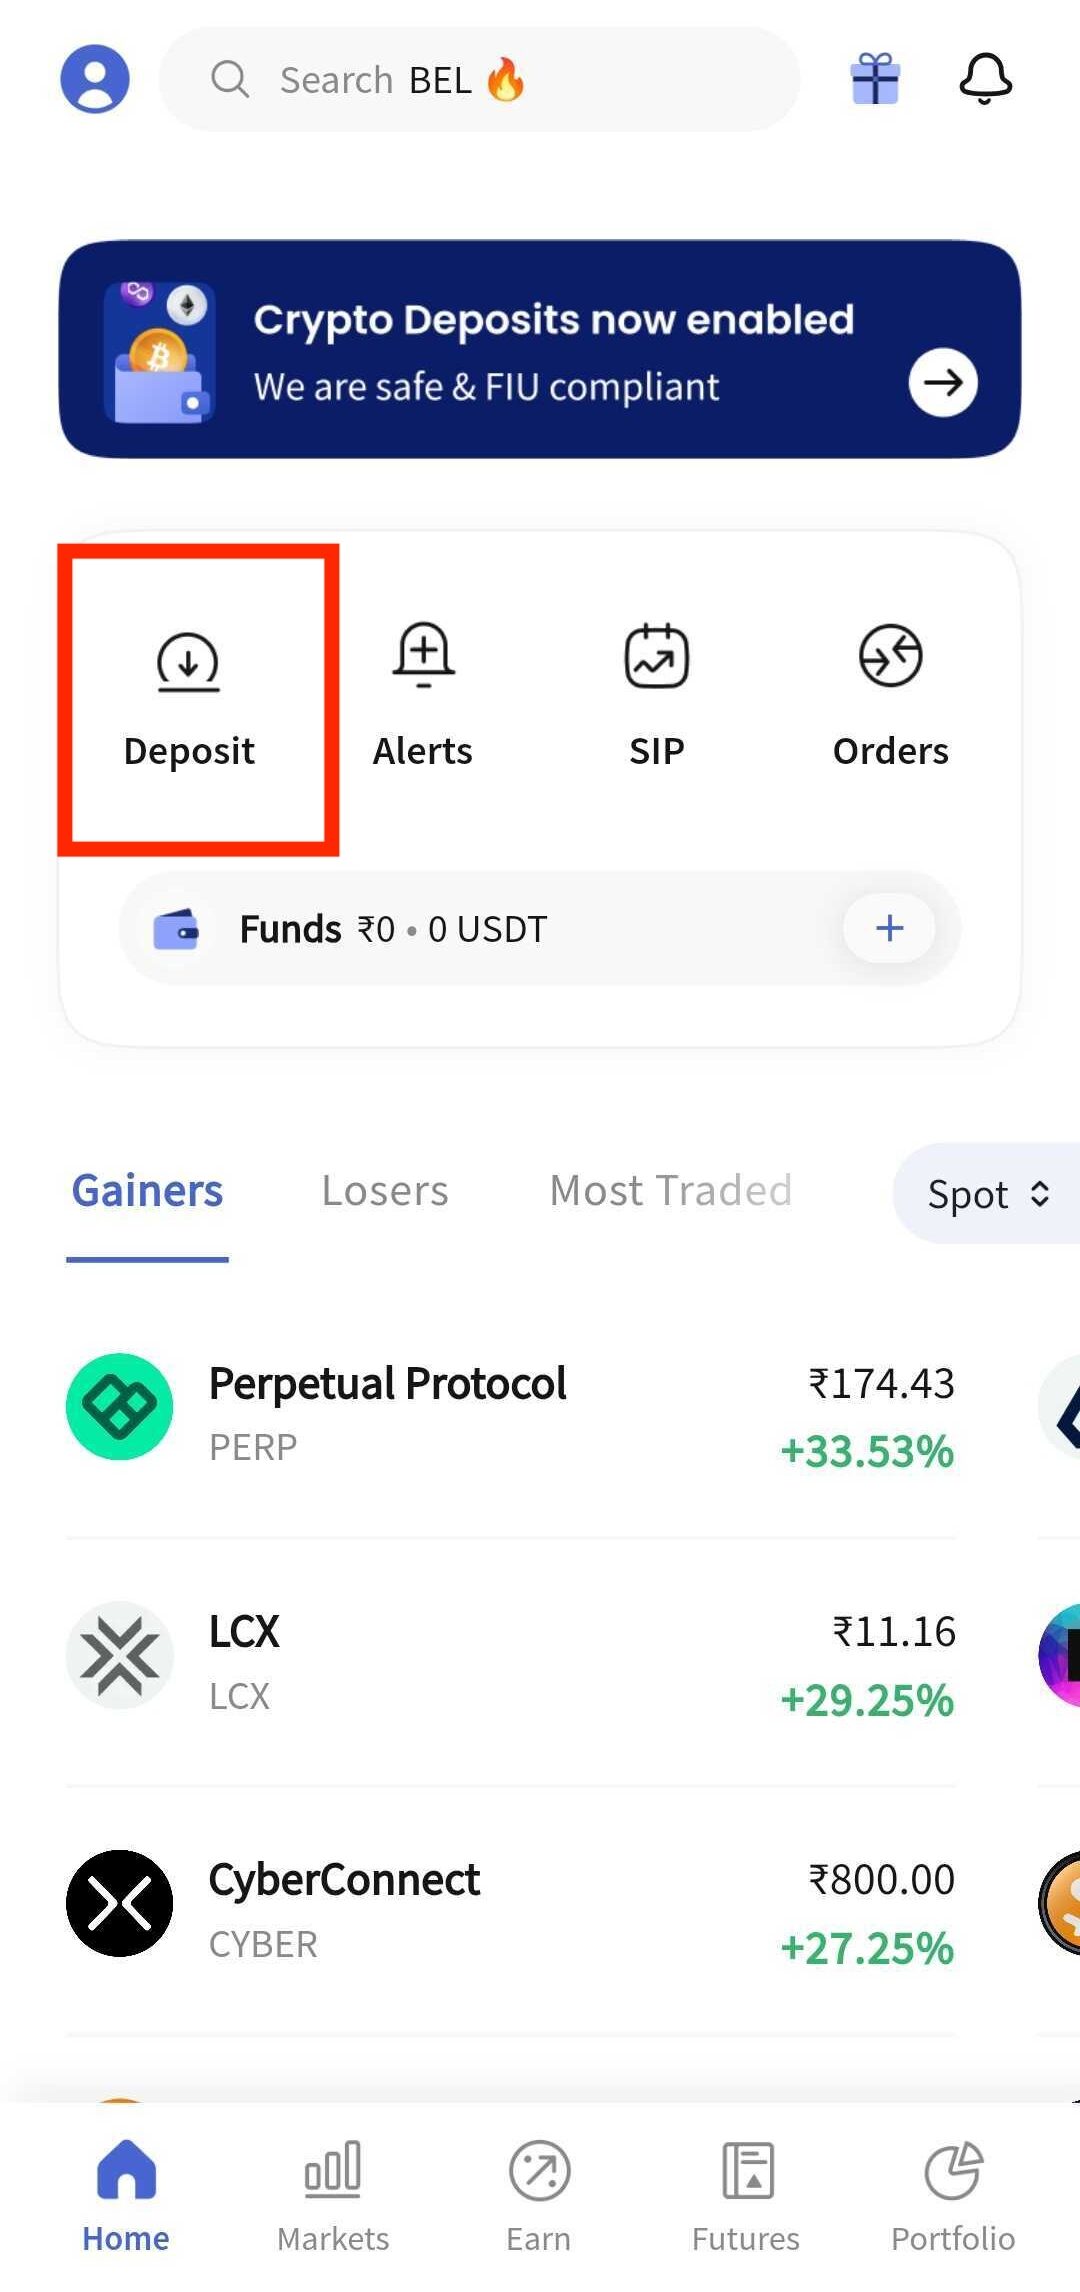
CoinDCX Home Page
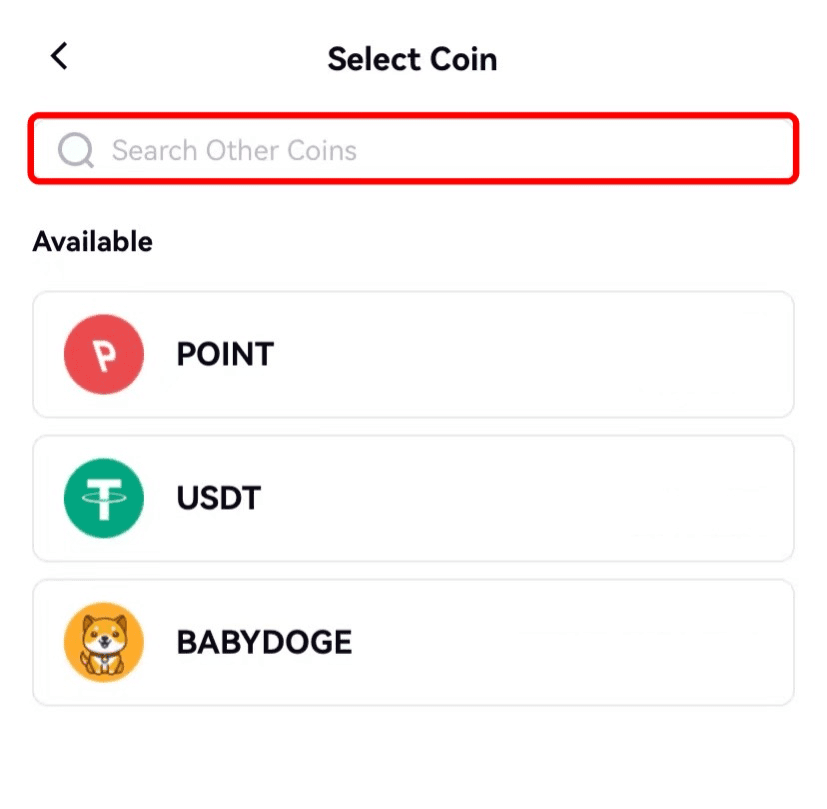
Step 2:
Choose the crypto asset you wish to withdraw from your Gate.io account and deposit in your CoinDCX account.
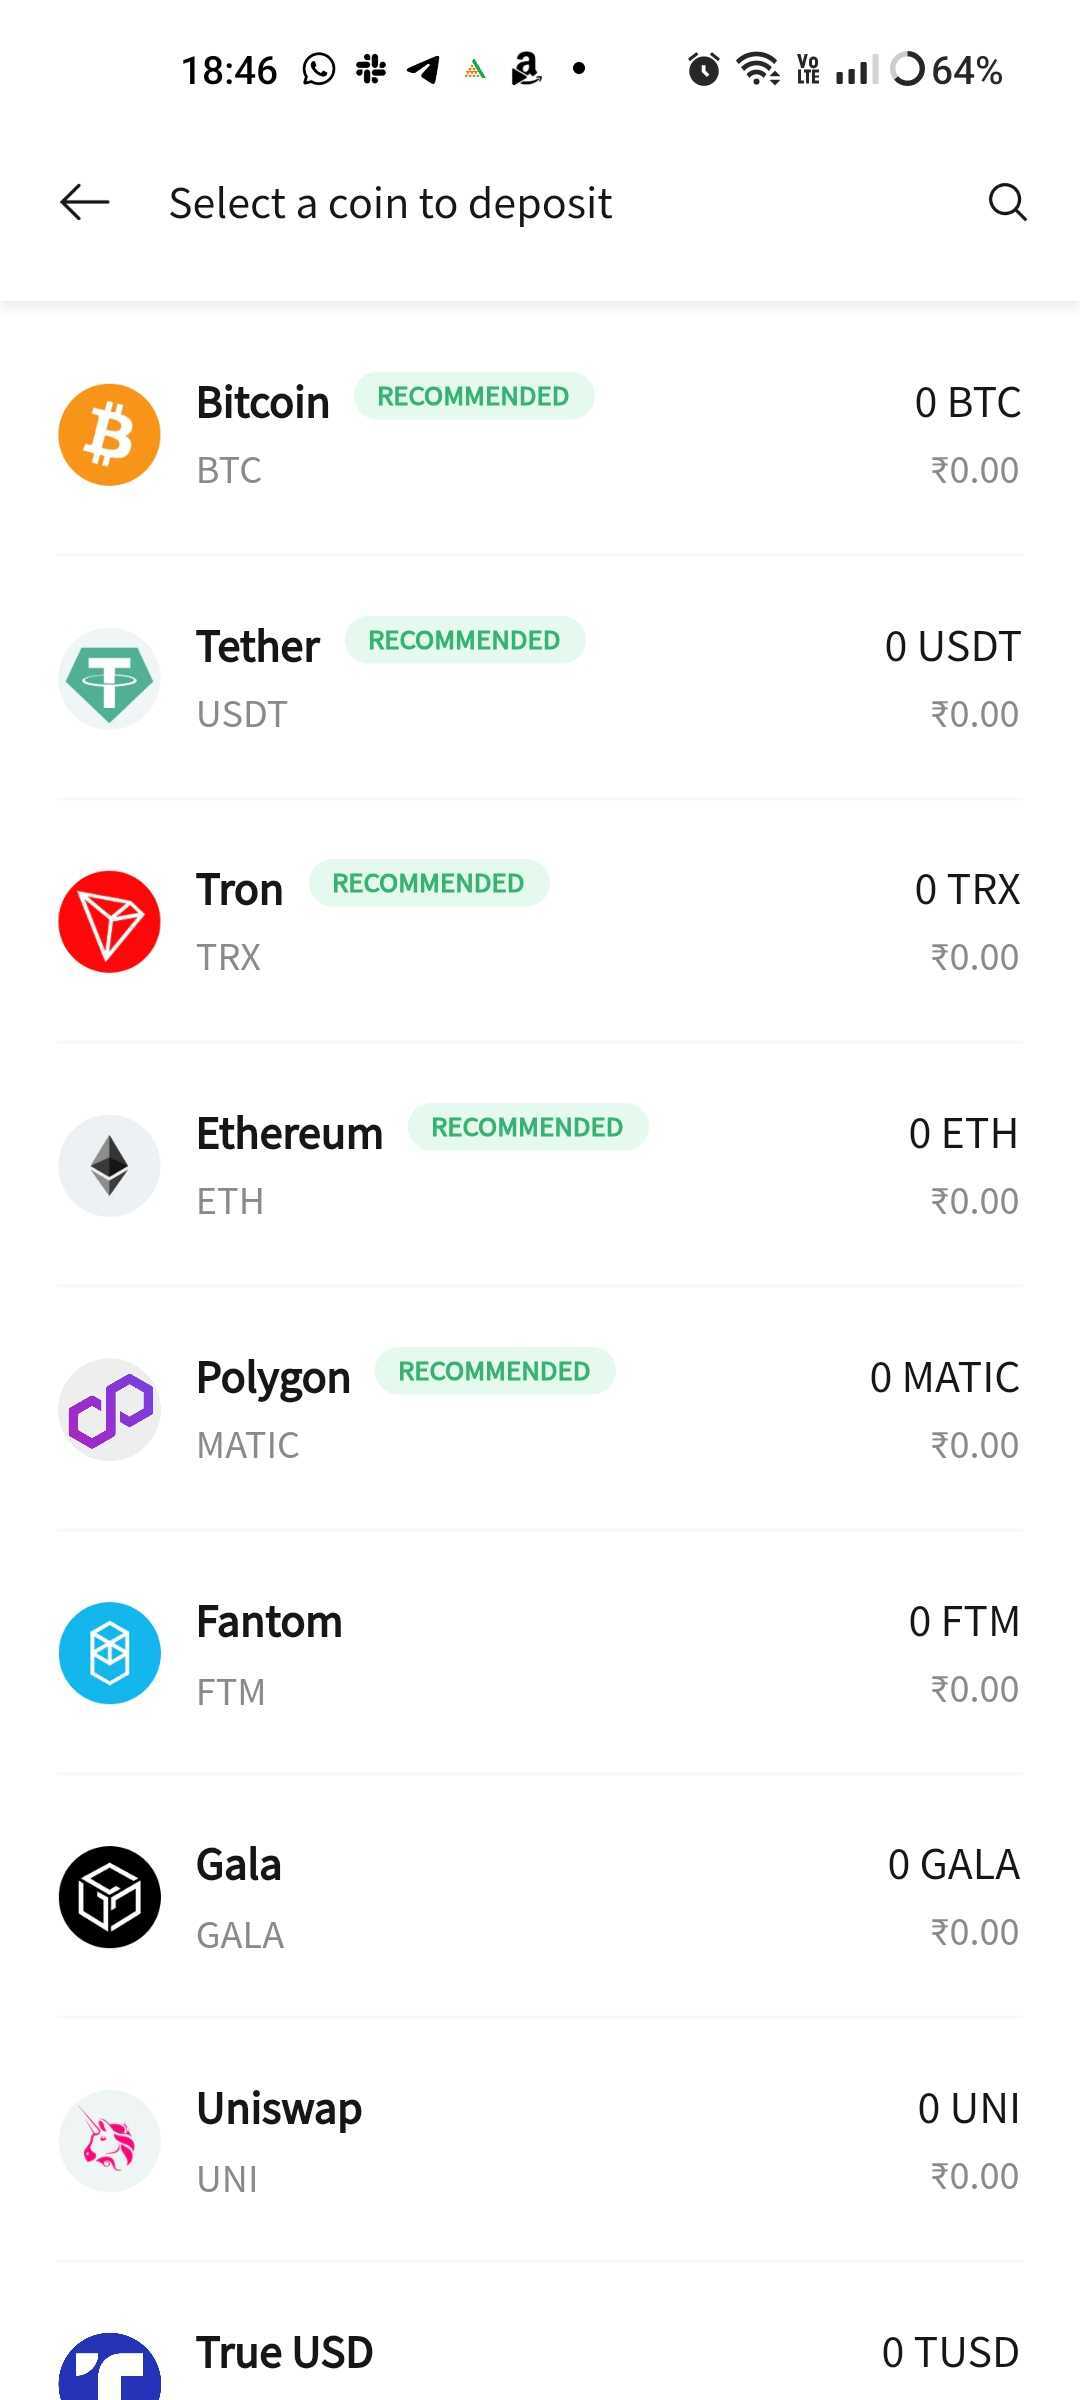
Choose Your Token
Step 3:
After choosing the token of your choice, locate the unique QR code and CoinDCX wallet address. You can use the wallet address to initiate the crypto withdrawal from your Gate.io account.
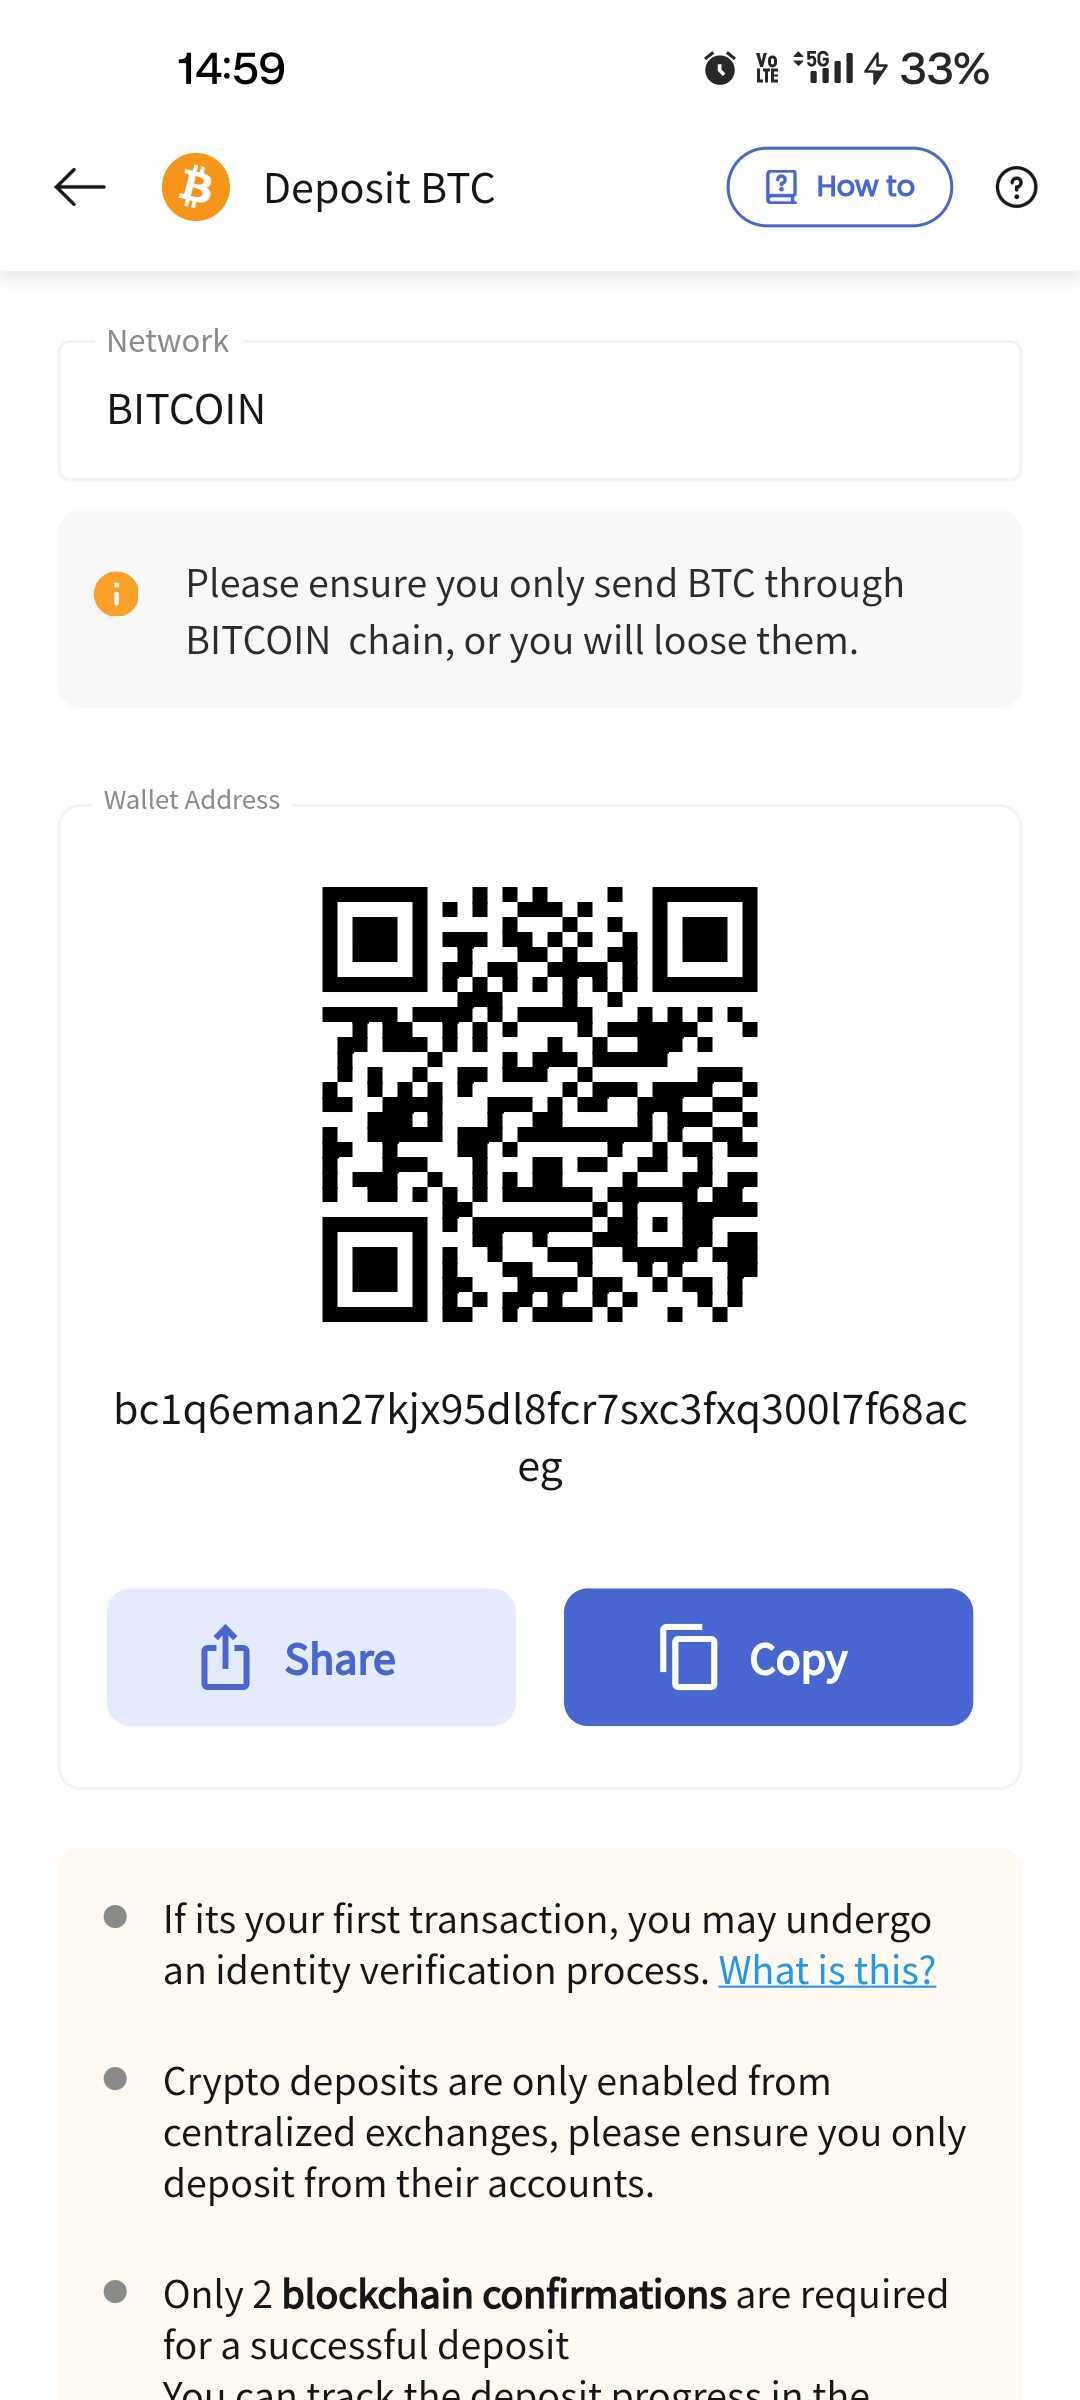
Bitcoin Deposit Form
Step 4:
Now, head over to your Gate.io app’s ‘Wallet’ page, and tap on the ‘Deposit’ button as shown below.
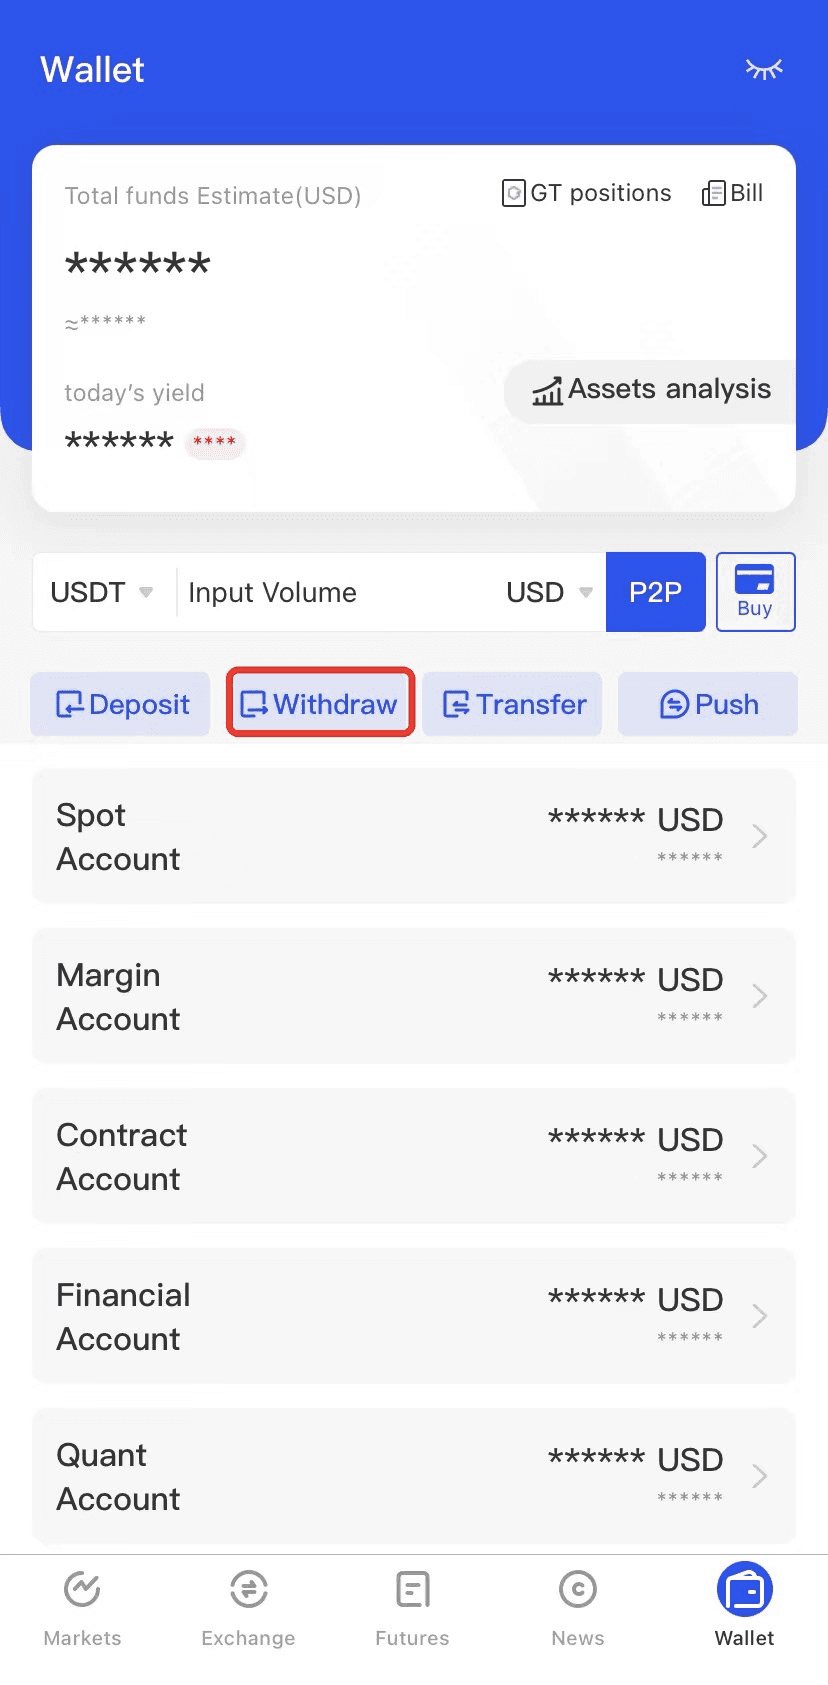
Gate.io Wallet Page
Step 5:
Input the desired withdrawal token and choose “Onchain Withdrawal.” For illustration, we’ll demonstrate the process using USDT withdrawal.
Choose Token
Step 6:
Choose a blockchain network, input the recipient’s address, and specify the withdrawal amount. After confirming, proceed by clicking “Next.”
Note: Ensure the withdrawal network matches the deposit network to avoid crediting issues; refunds are not possible.
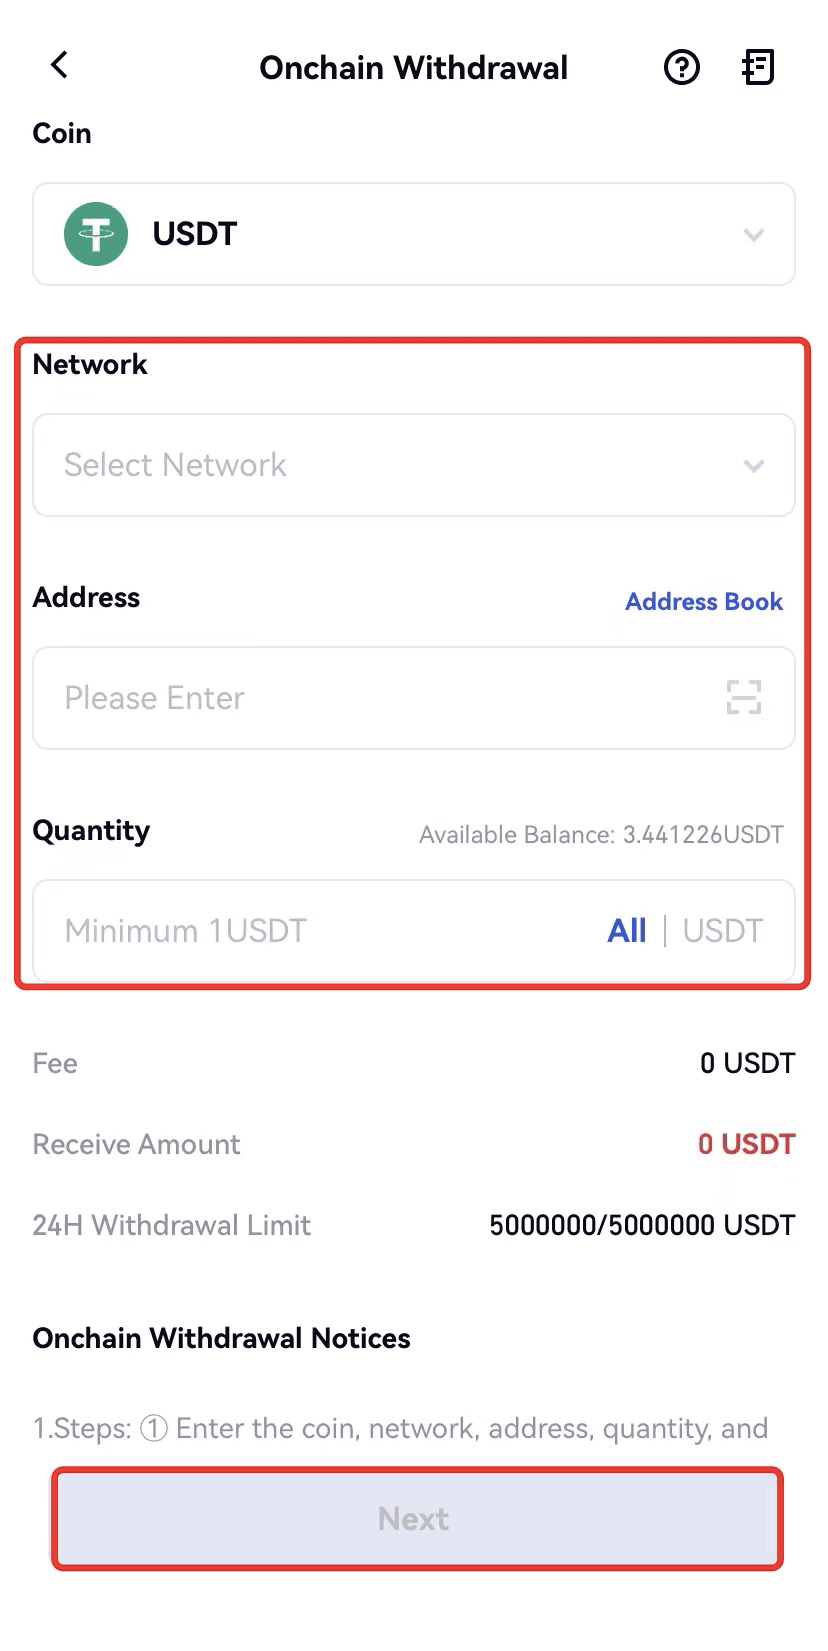
Withdrawal Form
Step 7:
Return to your CoinDCX app, wait for the transfer to display. Once visible, verify details by submitting a self-declaration confirming token deposit, stating the transfer’s purpose for compliance with Indian regulations. Complete the process by checking the acknowledgment box at the bottom. Now, proceed.
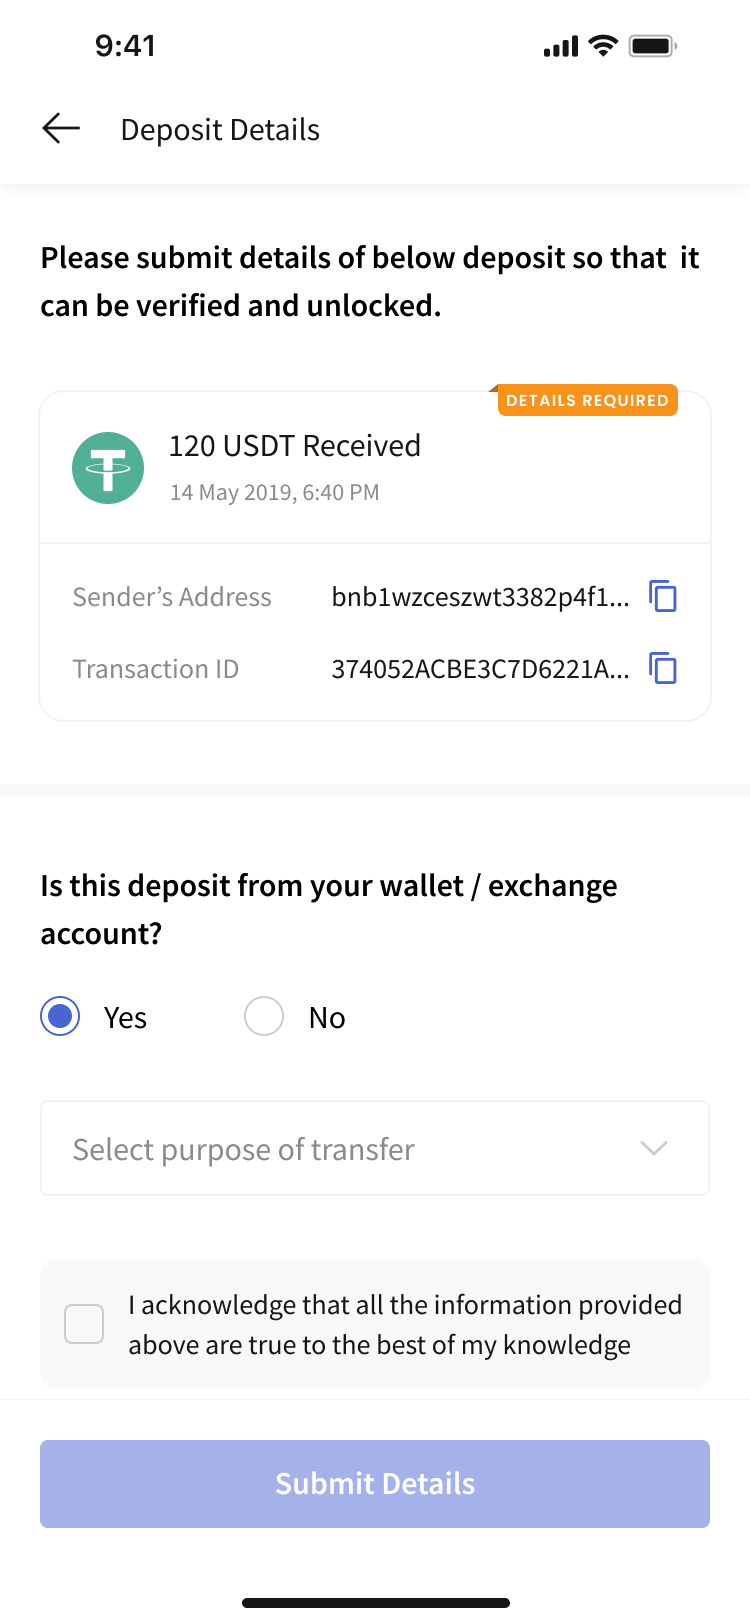
Self Deposit Form
Step 8:
Upon completion of verification and FIU protocols, your transaction processes, seamlessly depositing cryptos from Gate.io to your CoinDCX app!
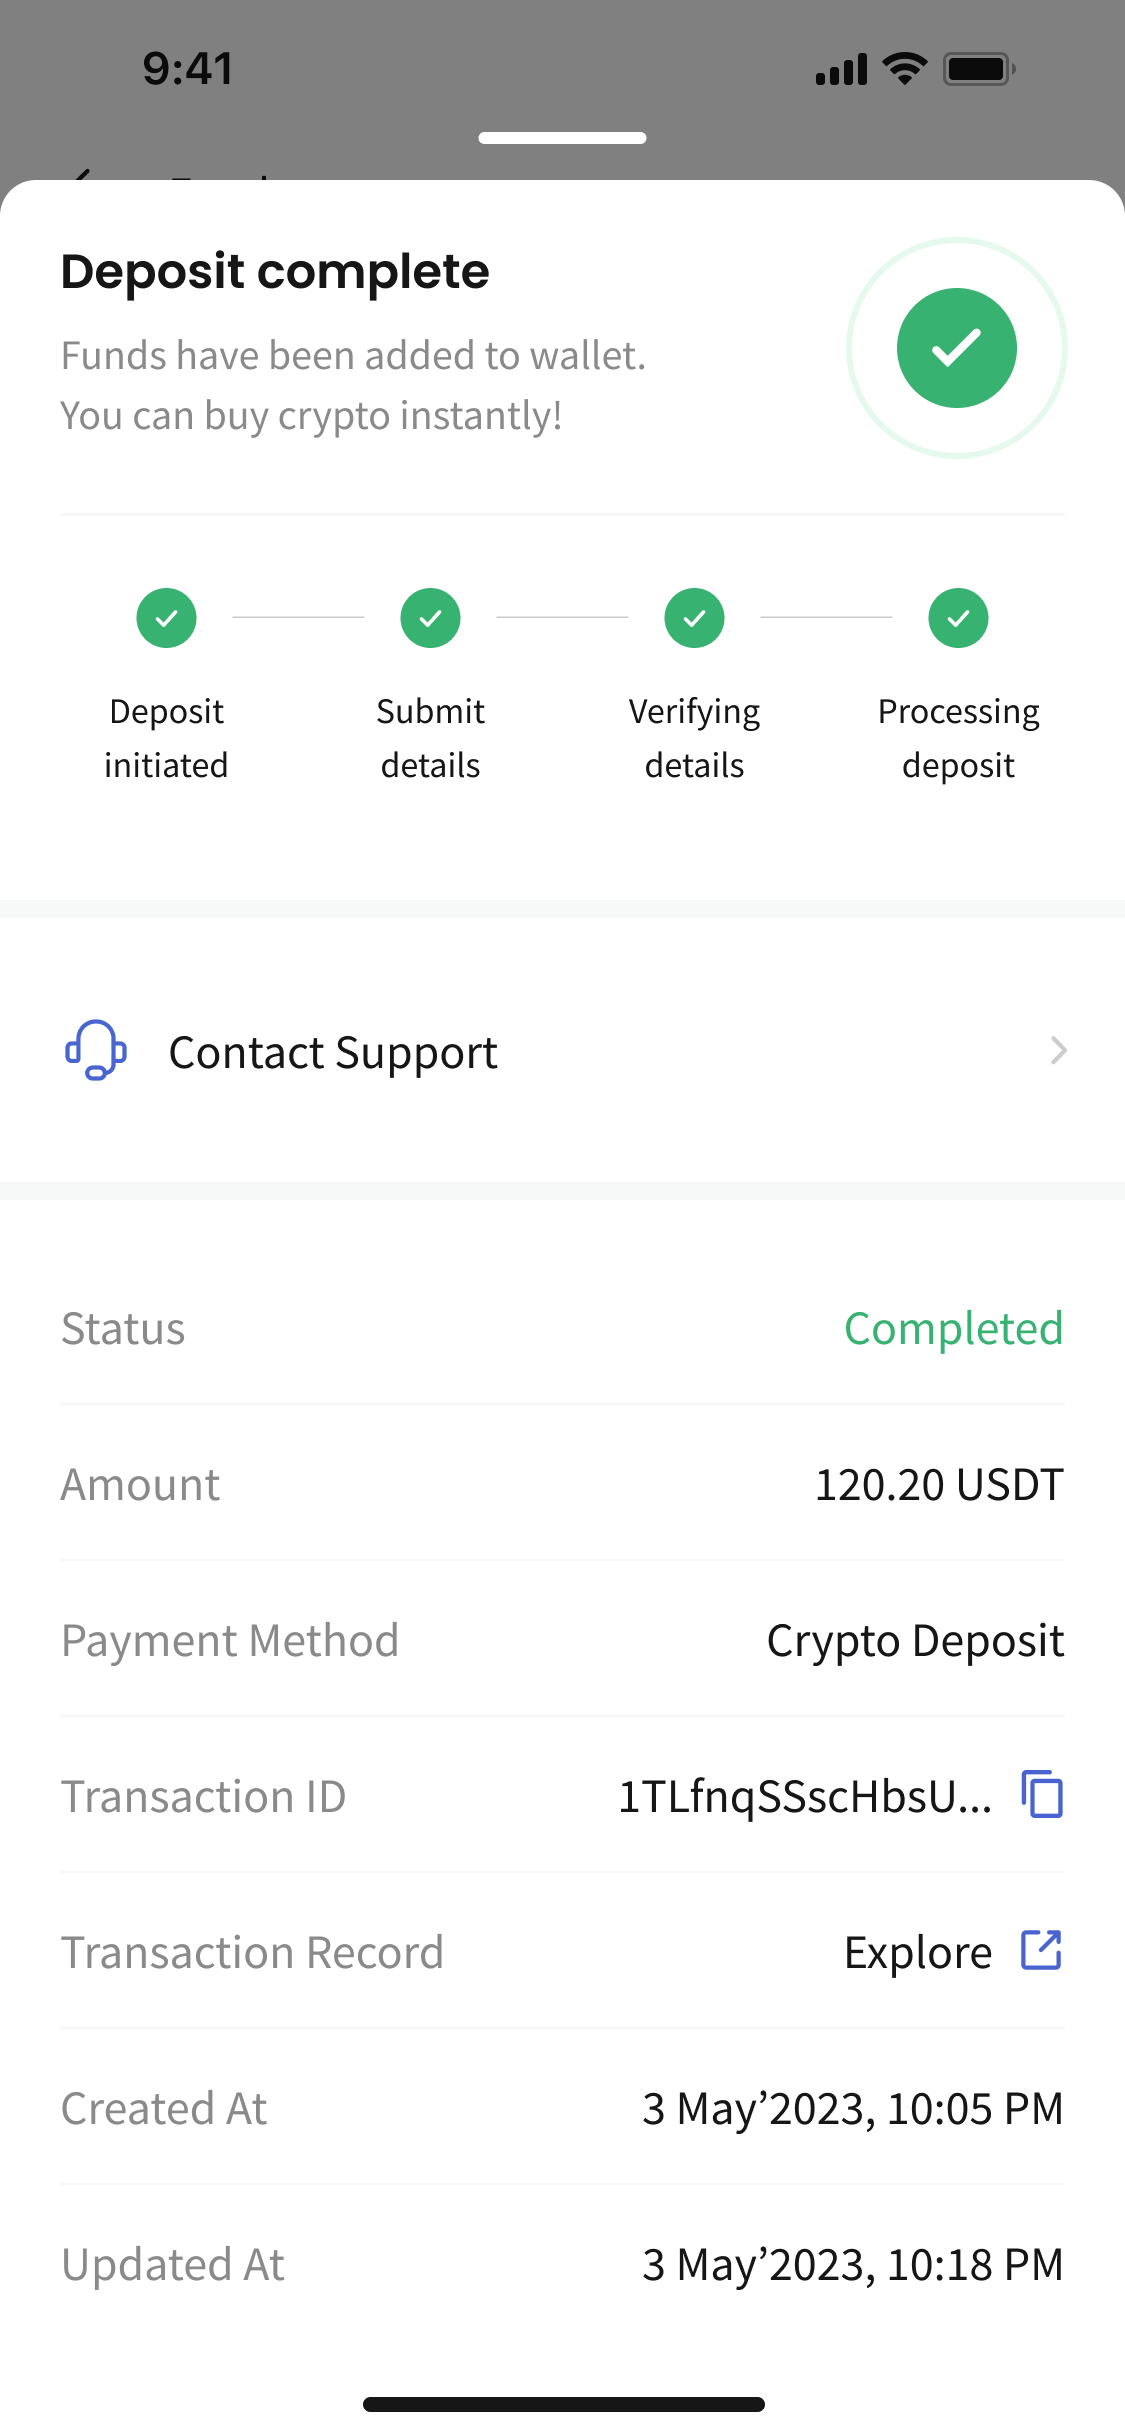
Token Deposit Now Complete
Conclusion
In conclusion, navigating the crypto transfer process from Gate.io to CoinDCX enhances your proficiency in managing and leveraging digital assets effectively. Understanding the subtleties of crypto transfers—such as supported coins, network compatibility, fees, and transaction limits—facilitates a seamless migration.
By adhering to the steps provided in this guide, you ensure secure and compliant transfers of assets. Embrace these insights for a smoother transition, safeguarding the security of your holdings while accessing the diverse offerings of CoinDCX. Start optimizing your crypto investments journey by efficiently transferring assets between Gate.io and CoinDCX today.
Screenshots sourced from Gate.io.
Read more: How to transfer Bitcoin from Binance to CoinDCX crypto exchange app
Related posts
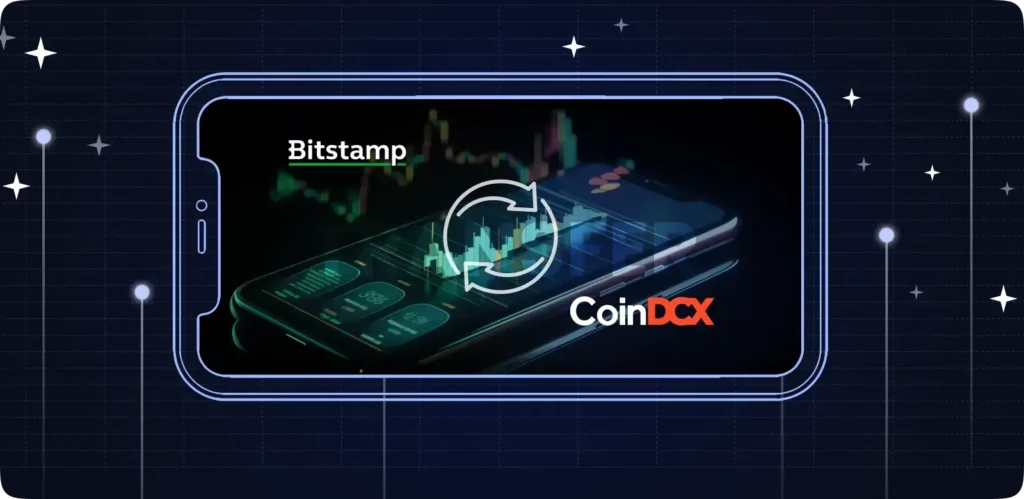
How to Transfer Bitcoin/Crypto from Bitstamp to CoinDCX Exchange App
Smooth crypto migration: Securely deposit from Bitstamp to CoinDCX!
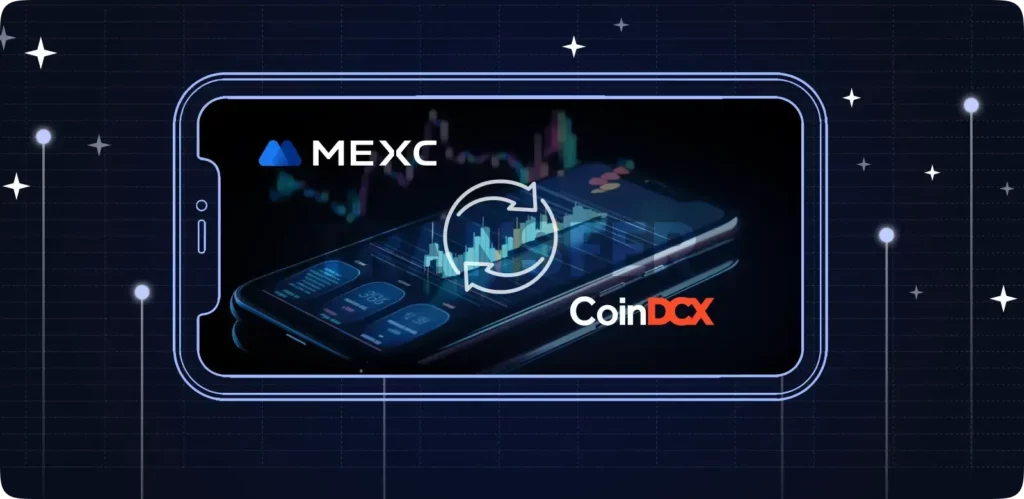
How to Transfer Bitcoin/Crypto from MEXC Global to CoinDCX Exchange
Simple crypto transfers: Safely deposit crypto from MEXC Global to CoinDCX.